How to create an 'About Me' page using Blogger
>> Saturday, 20 August 2011
Update 2012
As Blogger have updated their interface I have done a new post on how to create a stand alone page. You might find it more useful to go look at that, but the principles are the same.
------
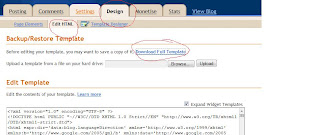
Before ever making changes to your blog CREATE A BACKUP.
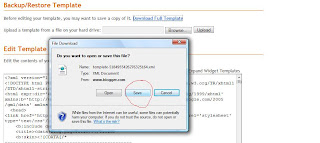 Then click save, save the .xml file into a place where you will remember where it is. I have a folder called templatebackups. I also always change the start of the file name to be something meaningful to me. Like 'KV_workingbeforepages_template-5184955426276325164.xml'. It's long but I will know what it means if I need to restore later.
Pages are different to blog posts, they don't sit in your time line, they are stand alone.
Create a page from your posting tab, instead of clicking on the New Post tab, go to Edit Pages (even if it is your first)
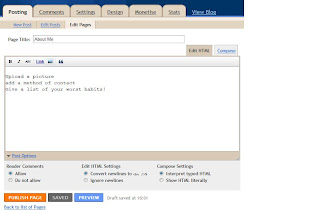 Once you have clicked on 'New Page', the editing is the same as if you were working on a post. But this is going to be static information for someone to come and find out about who you are.
 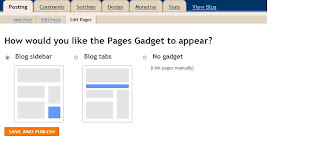 Once you have clicked publish page, if it is your first, you should get a page like this. This allows you to add either tabs to your blog, each of which are your pages plus a home, or a side bar list.
 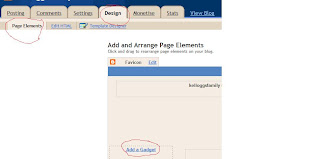 If you need to create the tabs yourself, because you missed the initial add a gadget option or your template doesn't already have them, then simply add the Blogger Pages gadget. Go to the top level Design tab, then page elements and click on Add Gadget.
The pages gadget is one of the basics, see it 4th one down here.
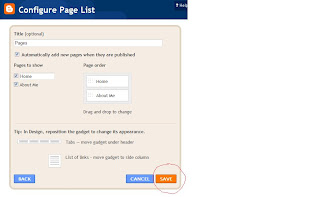 Don't worry about placement, once you've added the gadget, you can drag it around. Towards the top for tabs, or into the sidebar for a side list.
You might not want to include all pages in this gadget. I use a stand alone page for my Disclaimer.
<a href="http://kelloggsville.blogspot.com/p/disclosure-of-material-connection.html">Disclosure Policy</a>
To find the link address just view the page and copy and paste the url from your browser bar.
I hope you find this useful.


0 comments:
Post a Comment